Vue3 Tailwind CSS
在 Vue 项目中使用 Tailwind CSS 是一个很流行的选择,因为它提供了一种实用工具优先的方法来编写 CSS,使得你可以直接在类名中应用样式,这种方法使得样式编写更加简洁和直观。
Tailwind CSS 教程:https://www.runoob.com/tailwindcss/tailwindcss-tutorial.html
Tailwind CSS 官网:https://tailwindcss.com/
Github 地址:https://github.com/tailwindlabs/tailwindcss
Tailwind CSS 是一个功能强大的 CSS 框架,它通过实用工具优先的方法使得样式编写更加简洁和模块化。与传统的基于类的 CSS 框架不同,Tailwind 提供了一组低级实用工具类,这些类可以直接在 HTML 元素上使用,以便快速、灵活地构建自定义设计。
以下是一个使用 Vue 3 和 Tailwind CSS 的完整入门示例,展示了如何将 Tailwind CSS 与 Vue 3 集成并使用其功能来构建响应式界面。
安装 Vue 3 和 Tailwind CSS
首先,确保你已经安装了 Vue 3 和 Tailwind CSS。
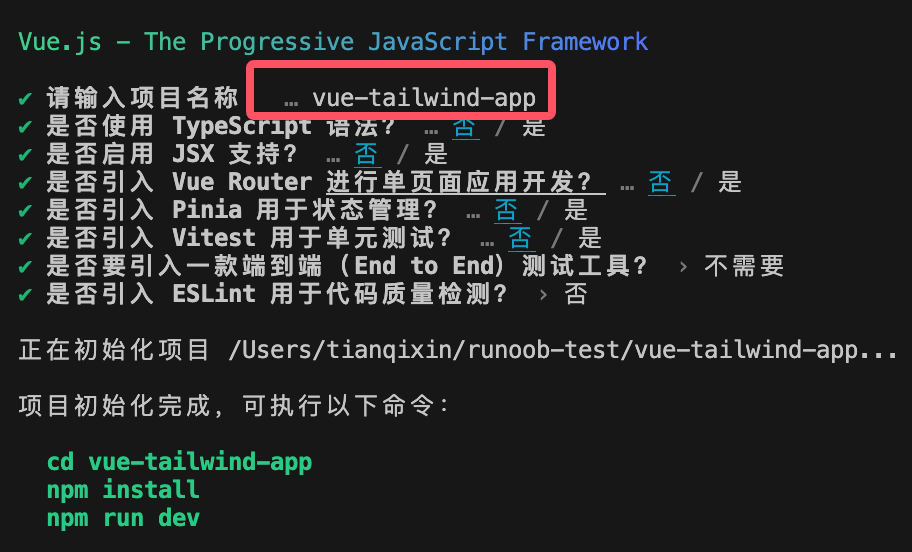
安装 Vue 3 在终端中执行 npm create vue@latest 命令创建一个新的 Vue 3 项目:
npm create vue@latest
在输出窗口中,输入项目名称,然后一路回车即可:

执行以上命令需要设置一些初始化的选项,使用方向键选择即可。
进入初始化的目录 vue-tailwind-app,安装依赖:
cd vue-tailwind-app
npm install
安装 Tailwind CSS 安装 Tailwind CSS 和相关依赖:
npm install -D tailwindcss@latest postcss@latest autoprefixer@latest
npx tailwindcss init -p
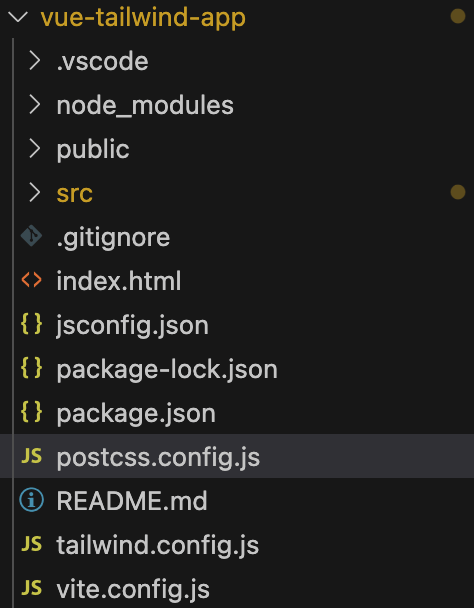
创建完成,目录结构如下:

配置 Tailwind CSS 打开 tailwind.config.js 文件并修改为:
实例
export default {
content: [
"./index.html",
"./src/**/*.{vue,js,ts,jsx,tsx}",
],
theme: {
extend: {},
},
plugins: [],
}
添加 Tailwind 指令 在 src/assets 目录下创建一个 styles.css 文件,并添加以下内容:
/* src/assets/styles.css */
@tailwind base;
@tailwind components;
@tailwind utilities;
然后在 src/assets/main.js 中导入该文件:
import './assets/styles.css
创建 Vue 组件和样式
现在,你可以开始编写你的 Vue 3 组件,并使用 Tailwind CSS 来美化页面。
App.vue
App.vue 是应用的主要组件,它包含了 Vue 3 和 Tailwind CSS 的基础用法。
实例
<div class="min-h-screen bg-gray-50 flex items-center justify-center p-6">
<div class="w-full max-w-md bg-white p-8 rounded-xl shadow-lg">
<h1 class="text-2xl font-semibold text-center text-gray-800 mb-6">
Vue 3 + Tailwind CSS 示例
</h1>
<!-- 输入框和按钮 -->
<div class="mb-4">
<label for="name" class="block text-sm font-medium text-gray-700">用户名</label>
<input
type="text"
id="name"
v-model="username"
placeholder="请输入用户名"
class="mt-2 w-full px-4 py-2 border border-gray-300 rounded-md shadow-sm focus:outline-none focus:ring-2 focus:ring-blue-500"
/>
</div>
<button
@click="submitForm"
class="w-full bg-blue-500 text-white py-2 rounded-md shadow-md hover:bg-blue-600 transition duration-200"
>
提交
</button>
<!-- 显示用户名 -->
<p v-if="submitted" class="mt-4 text-center text-gray-600">欢迎, {{ username }}!</p>
</div>
</div>
</template>
<script>
export default {
data() {
return {
username: '',
submitted: false
};
},
methods: {
submitForm() {
if (this.username) {
this.submitted = true;
} else {
alert('请输入用户名');
}
}
}
};
</script>
<style scoped>
/* 这里的样式是自定义的,如果需要的话 */
</style>
另外我们可以在 vite.config.js 文件中设置自己的端口,比如以下设置端口后为 3000:
实例
import { defineConfig } from 'vite'
import vue from '@vitejs/plugin-vue'
import vueDevTools from 'vite-plugin-vue-devtools'
// https://vite.dev/config/
export default defineConfig({
plugins: [
vue(),
vueDevTools(),
],
resolve: {
alias: {
'@': fileURLToPath(new URL('./src', import.meta.url))
},
},
server: {
port: 3000, // 自己规定的端口号
},
})
设置完成后,执行以 npm run dev 命令输出内容如下:
# npm run dev

> [email protected] dev
> vite


  VITE v6.0.3  ready in 333 ms

  ➜  Local:   http://localhost:3000/
  ➜  Network: use --host to expose
  ➜  Vue DevTools: Open http://localhost:3000/__devtools__/ as a separate window
  ➜  Vue DevTools: Press Option(⌥)+Shift(⇧)+D in App to toggle the Vue DevTools

  ➜  press h + enter to show help
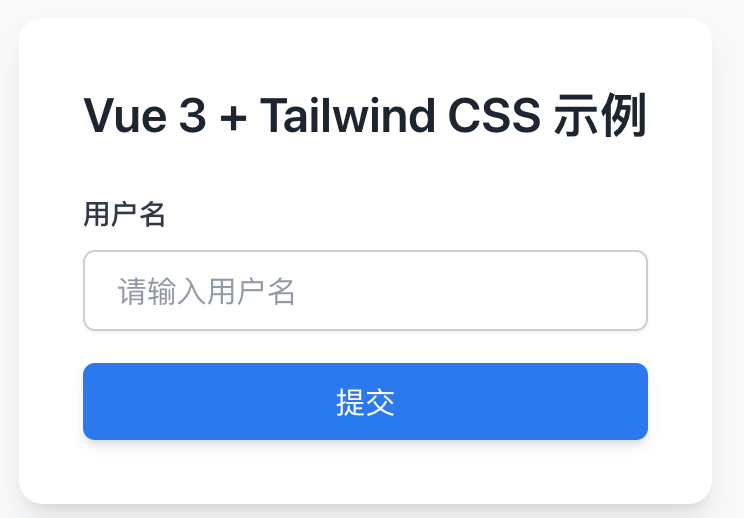
访问 http://localhost:3000/,显示如下:

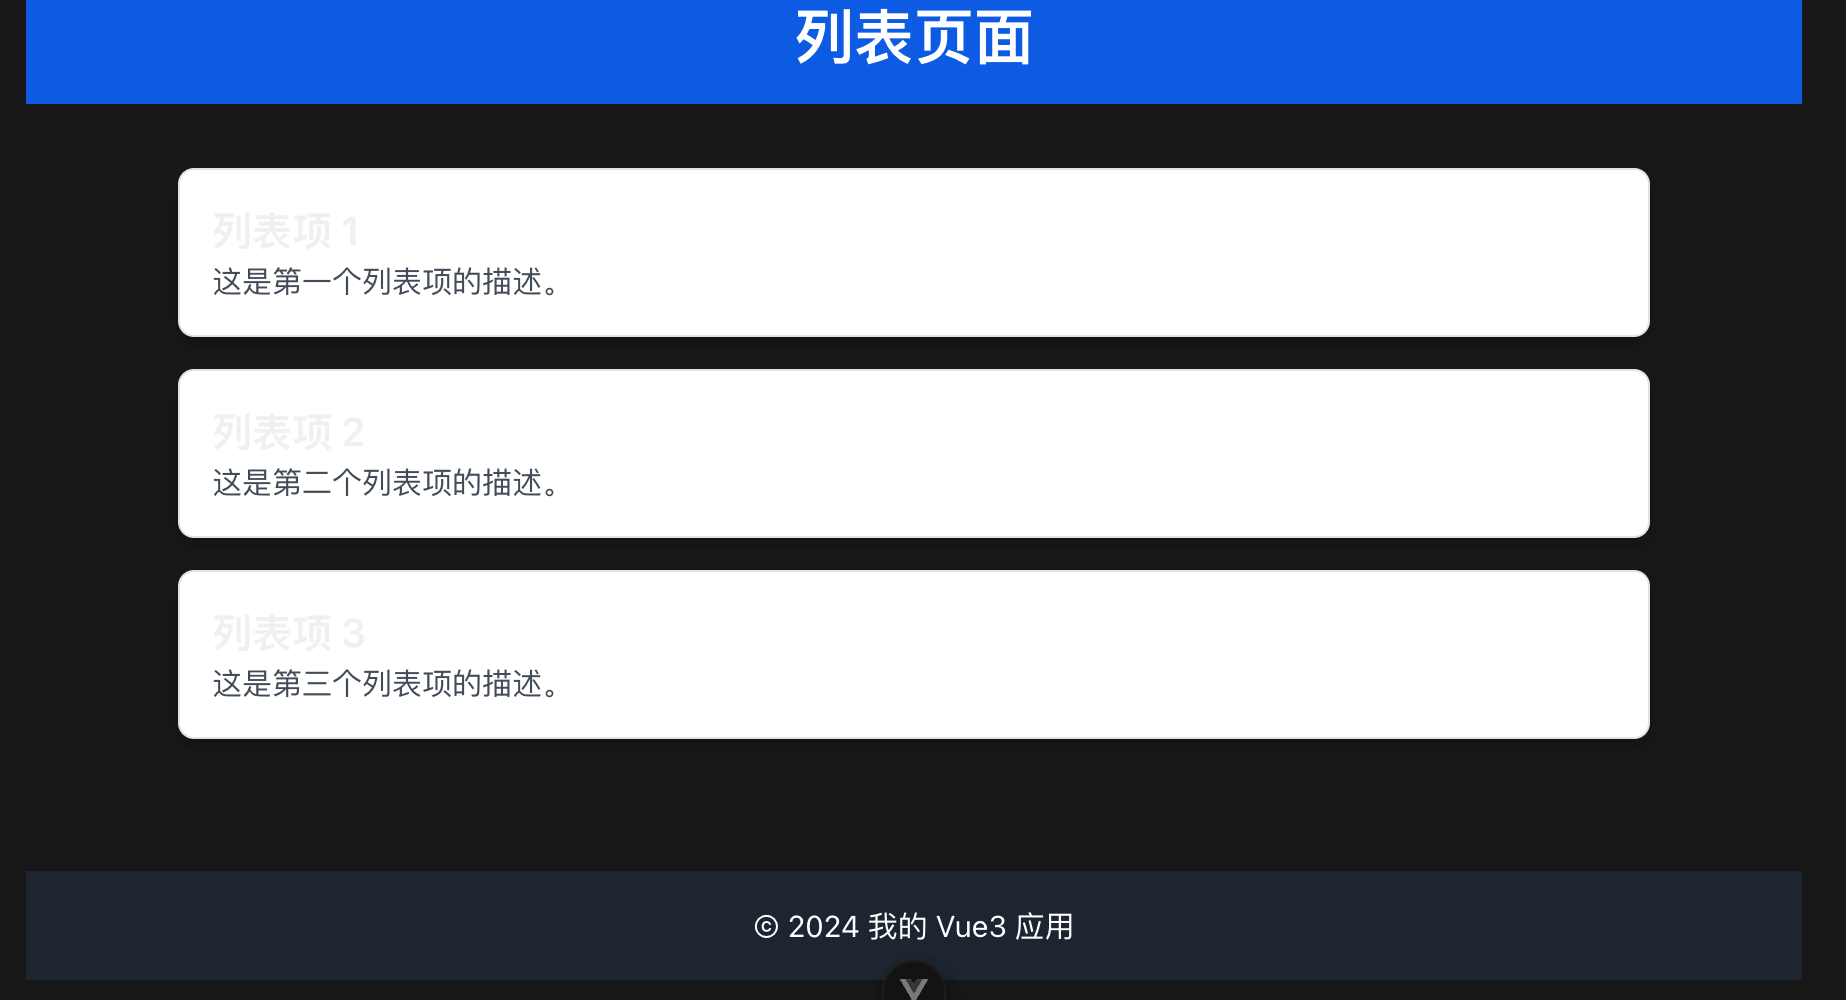
接下来我们尝试创建一个列表,修改 App.vue 文件,代码如下所示:
实例
<div class="min-h-screen flex flex-col">
<!-- 头部 -->
<header class="bg-blue-600 text-white py-4">
<div class="container mx-auto text-center">
<h1 class="text-3xl font-semibold">列表页面</h1>
</div>
</header>
<!-- 列表 -->
<main class="flex-grow py-8">
<div class="container mx-auto px-4">
<ul class="space-y-4">
<li v-for="(item, index) in items" :key="index" class="p-4 bg-white border rounded-lg shadow-md">
<h2 class="text-xl font-semibold">{{ item.title }}</h2>
<p class="text-gray-600">{{ item.description }}</p>
</li>
</ul>
</div>
</main>
<!-- 底部 -->
<footer class="bg-gray-800 text-white py-4">
<div class="container mx-auto text-center">
<p>© 2024 我的 Vue3 应用</p>
</div>
</footer>
</div>
</template>
<script>
export default {
name: "ListPage",
data() {
return {
items: [
{ title: "列表项 1", description: "这是第一个列表项的描述。" },
{ title: "列表项 2", description: "这是第二个列表项的描述。" },
{ title: "列表项 3", description: "这是第三个列表项的描述。" },
// 更多列表项
],
};
},
};
</script>
<style scoped>
/* 添加一些额外样式(如果需要) */
</style>
代码解析:
- 头部 (
header): 使用bg-blue-600设置背景颜色,text-white设置文本颜色,py-4设置上下内边距,container mx-auto用来设置固定宽度并居中。 - 列表 (
main): 使用flex-grow来使列表部分填满剩余空间,py-8添加垂直内边距。每个列表项使用了p-4,bg-white,border,rounded-lg,shadow-md等 Tailwind 类来设置外观。 - 底部 (
footer): 使用bg-gray-800设置深色背景,text-white设置白色文本,py-4设置内边距。
访问 http://localhost:3000/,显示如下:


点我分享笔记